REBELS Pipeline
Introduction
Quite early into production, our team wanted a pipeline to manage our assets and shots. We based our folder structure off of the Cave Academy VFX Structure, with a few changes for workspaces.
I (Chris) was in charge of maintaining the pipeline and keeping the plugin tools up to date.
Machine & Software Specs
As of 2025, the machines at Bournemouth Unviersity had a 12th Gen i9 CPU, 64GB Ram, and an Nvidia RTX 4080. For REBELS we used:
- Houdini 20.5.332
- Maya 2024/2025
- Nuke 15v2.4
- Blender 3.3.0/5.0.0
- Syntheyes
- DaVinci Resolve
- Agisoft MetaShape Pro 2.2
- Substance Painter 11.0+
Luckily, as our pipeline was USD based, we didn’t have to worry too much about software version mismatches.
Cross Compatibility & Storage
All the machines at Bournemouth are dual boot Windows 11 / RHEL 9. We wanted to be able to easily access and share our files between the two, and across multiple machines. Our approach to this was to use Microsoft Teams and OneDrive. We found that a singular Teams group could store 25TB data, and we could directly shortcut the teams folder into OneDrive for directly access in the file browser. This meant that we could launch Houdini (for example), and it would load all nessacary files on demand whilst we worked. Leading to a heavily streamlined workflow.
To get this working in Linux, I also designed an rclone setup script that would mount the teams drive into /home/user/REBELS.
I also setup a $RBL environment variable for Linux and Windows which could be use for absolute pathing (otherwise a user’s username would break absolute paths). However, we tried to stick with using relative pathing where possible.
Houdini Non-Commercial Challenges
One challenge we had was that when working on REBELS on our home devices, our files would lock to an Apprentice Non-Commercial version. This meant that all usd files were being saved as .usdnc, and our render’s were watermarked.
To solve this, we had to come up with a specific workflow that avoided the “corruption” of our scenes.
USD, Houdini, Solaris
We quickly agreed on using a Houdini centric USD pipeline for production. It was incredibly successful in previous group projects and we didn’t want to deal with the fuss of Maya projects.
The Asset Pipeline
Our asset pipeline begins with modelling in any DCC of choice and exporting as .usd (or another format) into Houdini (and other respective DCCs). Then, textures and lookdev (and potentially a groom) are combined into a static usd asset layer. This is the base asset.
Rigs are then created using Houdini APEX. The APEX graph is saved as houdini .bgeo, and the USD binding is saved as a layer which is added onto the base asset.
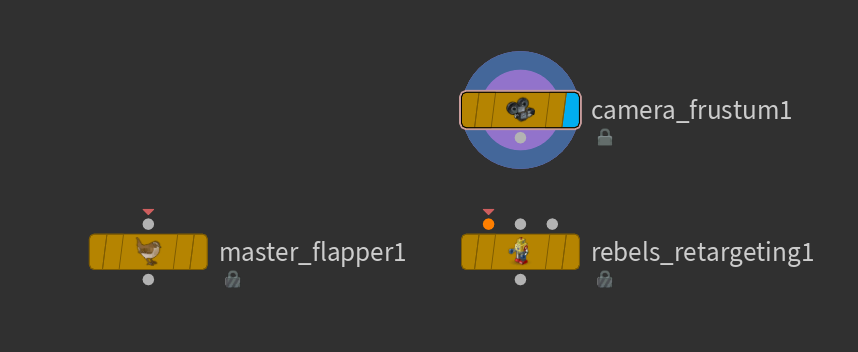
Using a custom asset loader, the asset can be loaded statically, with a rig, and with our without groom. When doing CFX, the CFX setup .bgeo can be used for simulating as it can hold all the vellum (or other sim) properties.
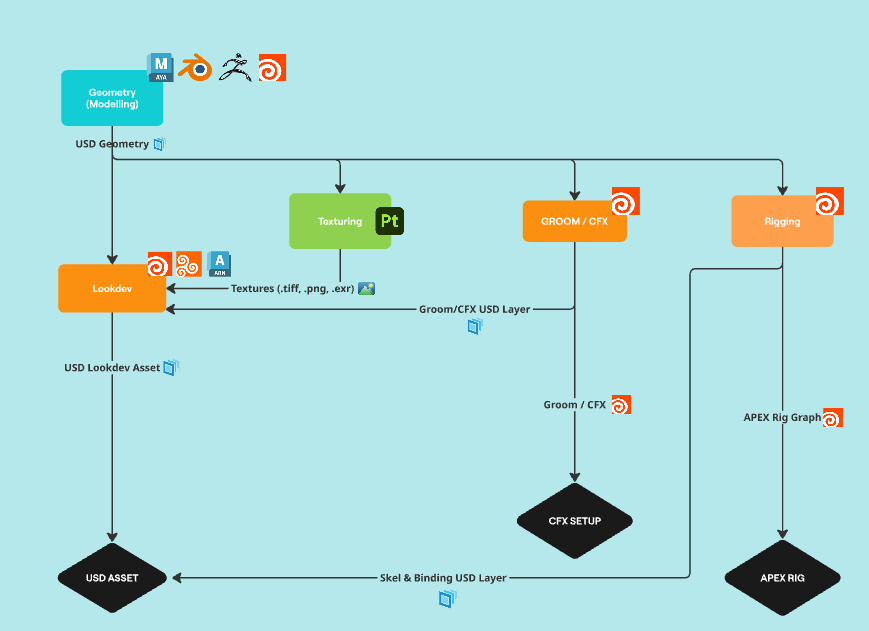
You can read more about how we made our assets here.
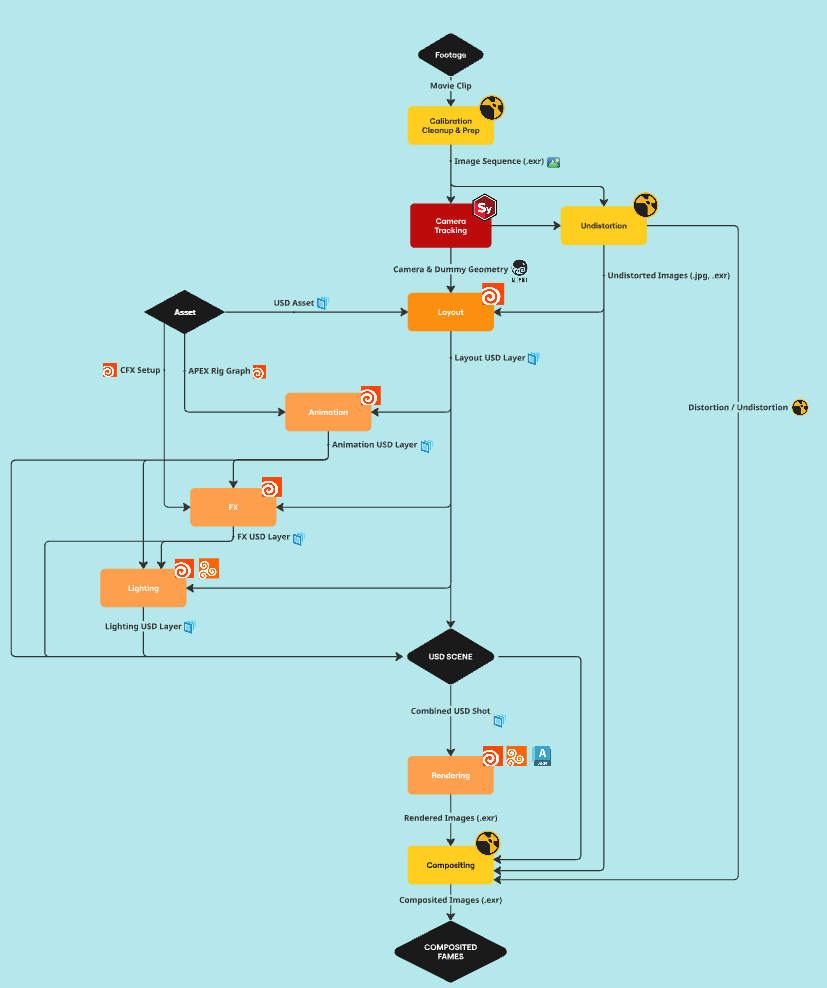
The Shot Pipeline
Our shot pipeline was primarily Houdini and USD based, aside from compositing which was done in Nuke. We had two kinds of shots in production, VFX and CG.
- Shot Pipeline: VFX -
VFX shots begin with taking the original footage and converting it into a .exr sequence. This sequence can then be tracked in SynthEyes in which a 3D camera, dummy geometry, and distortion data are generated.
The 3D camera and dummy geometry are fed into Houdini for layout, whilst the distortion data is used to create undistorted backplates (these will be redistorted later with our CG).
- Shot Pipeline: Layout -
CG shots skip the footage, tracking, and distortion step and jump straight into layout.
In layout, USD assets are referenced in and camera animation is polished. A layout layer is published for the next step of the pipeline.
- Shot Pipeline: Animation -
In animation, rigged USD assets are referenced and animated. This can overwrite any layout USD assets that need animation due to how USD is designed. Once animation is complete, a animation layer is published.
Read about more of our challenges with animtion here.
- Shot Pipeline: FX -
In FX, the data from layout and animation layers can be used to do RBD destruction, pyro, and whatever else. Volumes are added to the stage as .VDBs and other geometry elements are added normally. The finished shot is then exported as an fx layer. In some cases, we had multiple FX layers so that we could render specific FX elements without loading everything.
You can read more in depth on how we did our FX in Houdini here.
- Shot Pipeline: Lighting -
As we already have the layout layer from the start. We were able to Lighting whilst animation and FX were under way. In lighting we would setup our render settings and render layers with AOVs and LPEs. We then would export our lighting.usd layer.
- Shot Pipeline: Rendering -
For rendering, we would have a Houdini file that would load in all the layers that we needed. From here we would do any last minute render fixes (such as DOF, Motion Blur, Overscan) and then we would render the shot out.
Becase we were using Solaris, we could switch to any renderer that we wanted (with a few tweaks). We originally wanted to use Arnold for rendering but we stuck with Karma because it was one of the fastest renderers available to us (It also meant we could use the renderfarm).
- Shot Pipeline: Compositing -
In compositing we are then able to load our the footage .exr sequence, the rendered frames (as a .exr sequence) and (if needed) entire .usd scene into Nuke. From there we composite and export out frames for the final edit.
In some shots we had matte paintings. These were done in Photoshop and Nuke.
You can read more about our compositing techniques here.
Color Pipeline
We struggled alot early on with our color pipeline, however towards the middle part of production we started to understand how things worked.
All our renders were done in ACEScg, we had a custom OCIO config that was shared between all our DCCs. We then comped out as Linear in Nuke, with our own DaVinci Resolve color transform applied on top.
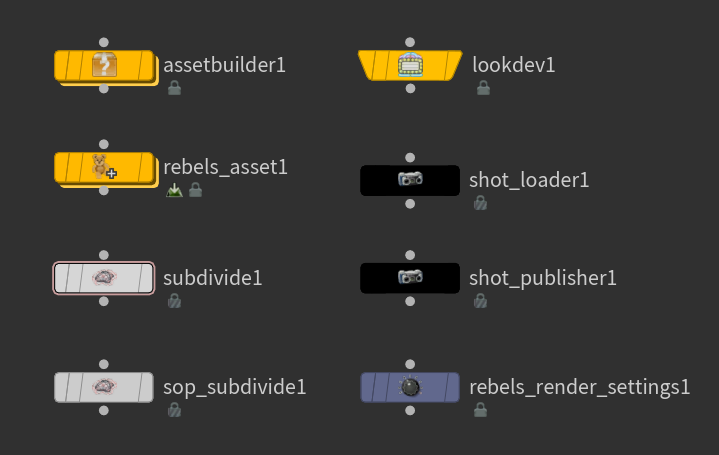
Custom Tools & The NCCA Renderfarm
I also developed numerous Houdini tools to help speed up production. Below you can see our custom SOP nodes (left), and custom LOP nodes (right).
I also made a custom Houdini launcher for the project. Featuring ours truly, Timothy Courtice.

The NCCA Renderfarm
The NCCA Renderfarm is infamous for being unusable at Bournemouth University. Mostly abandoned, it was only configured to work with rendering in Houdini.
The farm featured a convoluted submission setup, in which most previously written tools were depricated. I spent a couple weeks developing a Houdini Solaris node that would package projects into a single folder, submit it to the farm, and then render them as a farm job.
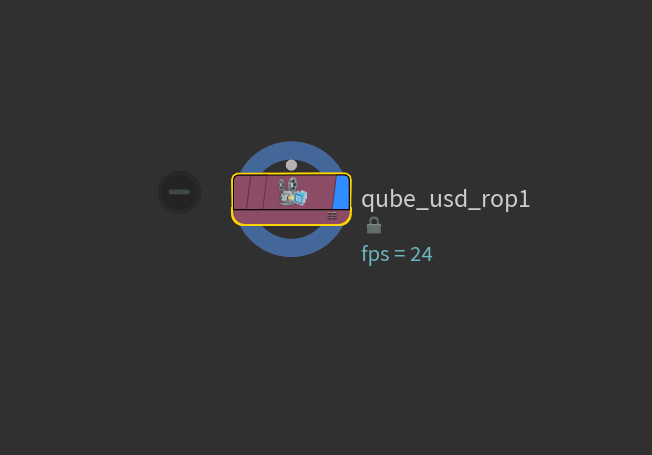
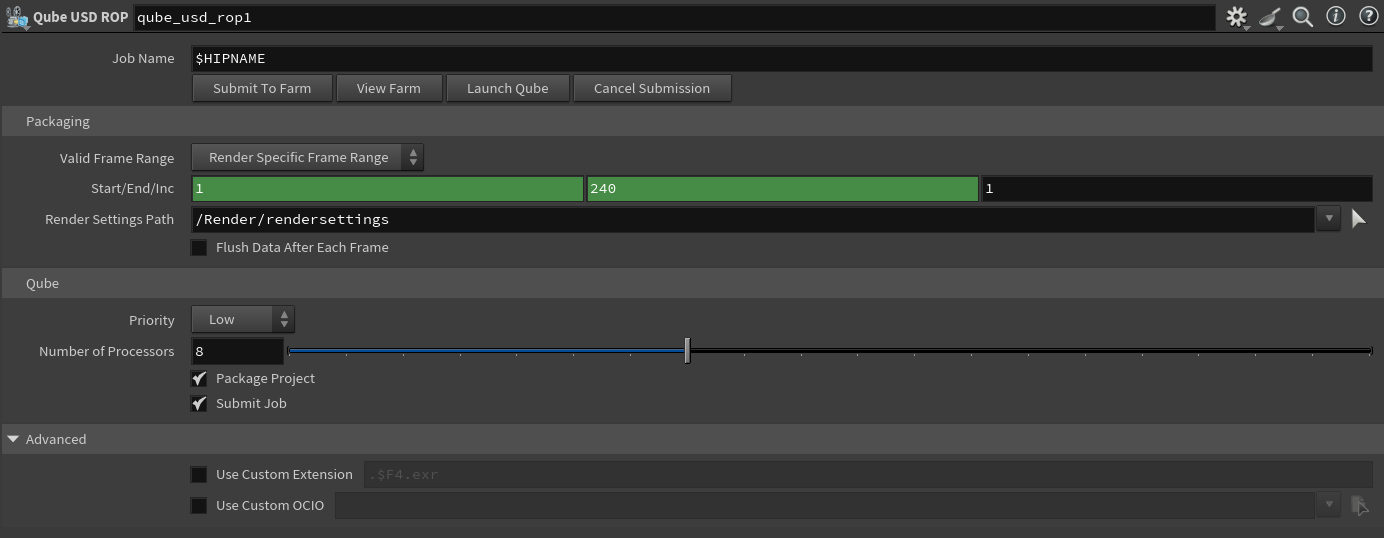
This tool dramatically sped up our renders and we didn’t have to worry much about long render times for shots.