REBELS Rigging & Animation
Introduction
REBELS is the first student project at Bournemouth University to have a full APEX Animation Pipeline. The main intention behind this was not only to explore new technologies, but to also get around the Maya-Houdini pipeline conversion trouble that would have occured otherwise.
It was an incredibly risky decision and we came across numerous issues and frustrations. However, when working smoothly, APEX was an absolute life safer and helped us iterate through our rigs and animations at an incredible speed.
We’ve decided write about our experience and understanding of it to help future artists navigate using APEX.
It is important to preface that we were using Houdini 20.5 when rigging. Alot of issues that we came across have been fixed in Houdini 21 and beyond.
APEX Rigging
APEX (All-Purpose EXecution) is Houdini’s new rigging and animation alternative to KineFX. It features a specialized rigging graph system that can be more quickly executed than other methods.
At the time of rigging (mid/late 2025), there was very little documentation on how APEX worked. I (Chris) spent months exploring how the graph system worked and how we could tie it into REBELS.
I found there to be 3 main steps for rigging with APEX.
- Create the Joints
- Bind the Skin
- Build the APEX Graph
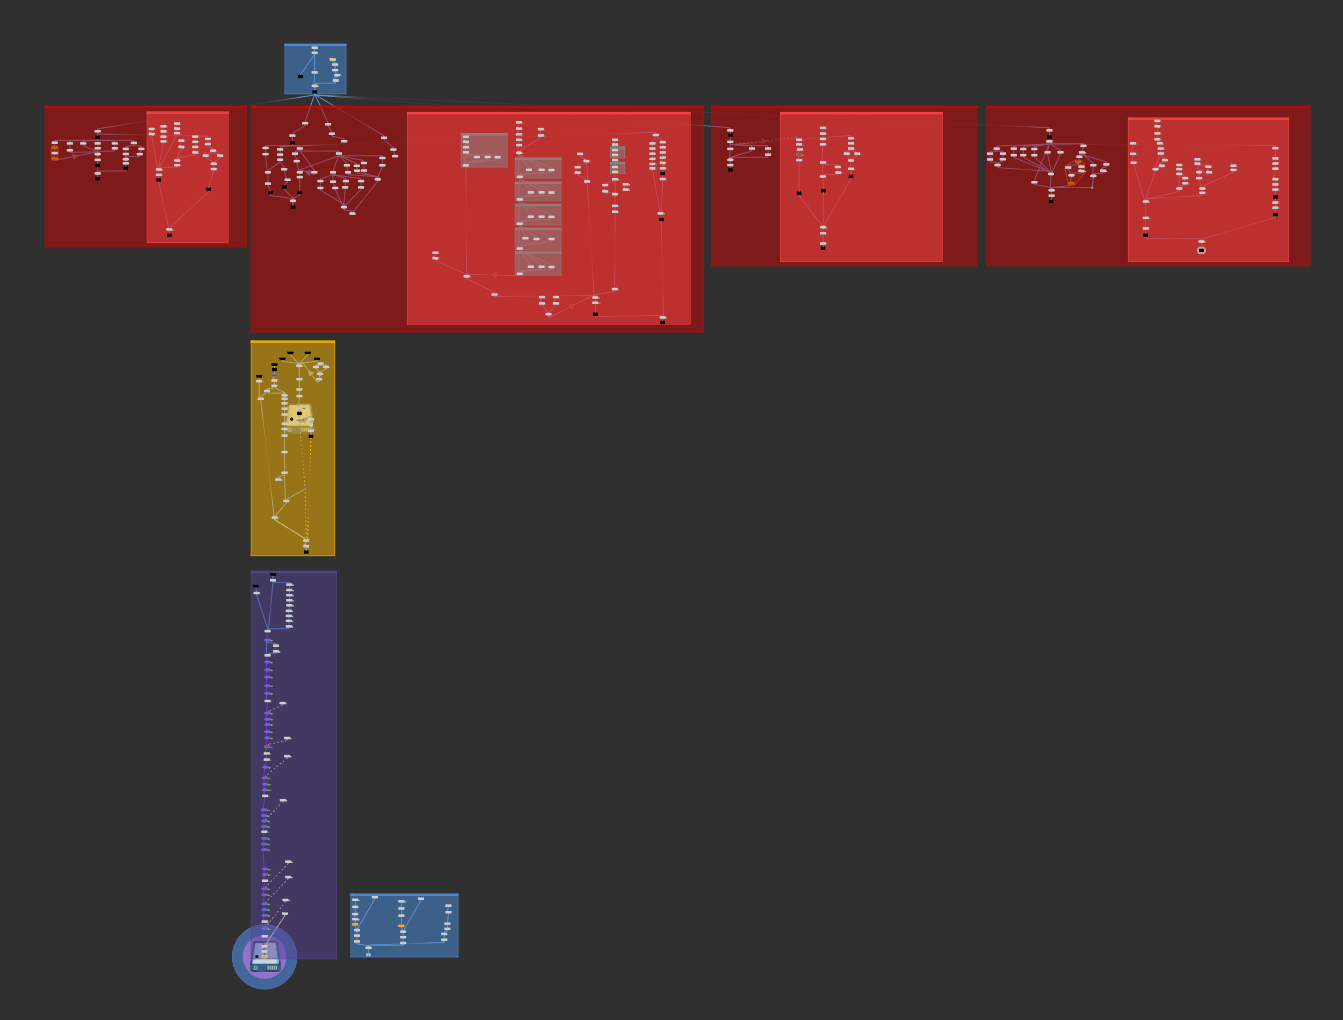
Our APEX rigging process. Joint creation (red) feeds into binding (yellow) and then finished with the APEX setup (purple).
Steps 1 and 2 are trivial and are the same as how one would rig with KineFX; you need to generate points, give them orientations, and then bind them to the skin. Theoretically, jointing and binding could be done in another DCC and brought into Houdini.
Our assets were mostly hard surface (with the exception of a few wires), so the binding process was extremely simple.
After binding is done, we can jump into step 3; building the APEX Graph.
The APEX Graph
For anyone who has done node based rigging before (like with Maya’s node graph), you’d understand the premise of using nodes to control your rig.
APEX is similar, however you very rarely ever touch the rig graph; You create nodes that edit it. For example, if you wanted to parent two nodes together. You wouldnt join them up, you’d use a node to connect them.
This very much feels like an extra step, however SideFX suggest it leads to a more non-destructive (and more quickly executed) rig workflow.
There is nothing stopping you from directly editing the rig graph, however it can destroy APEX’s non-destructive workflow and can get very messy, very quickly.
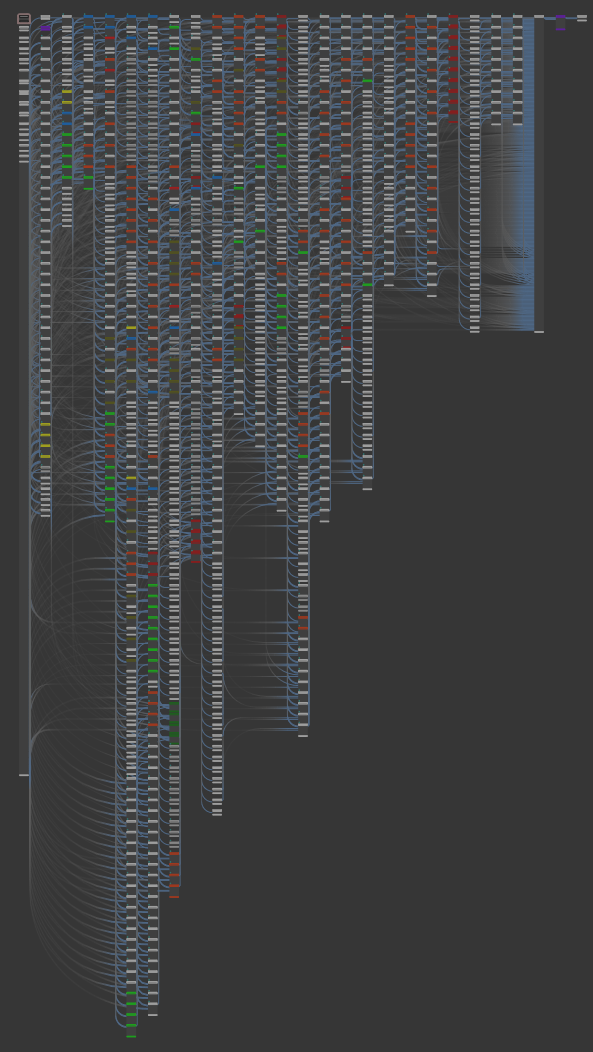
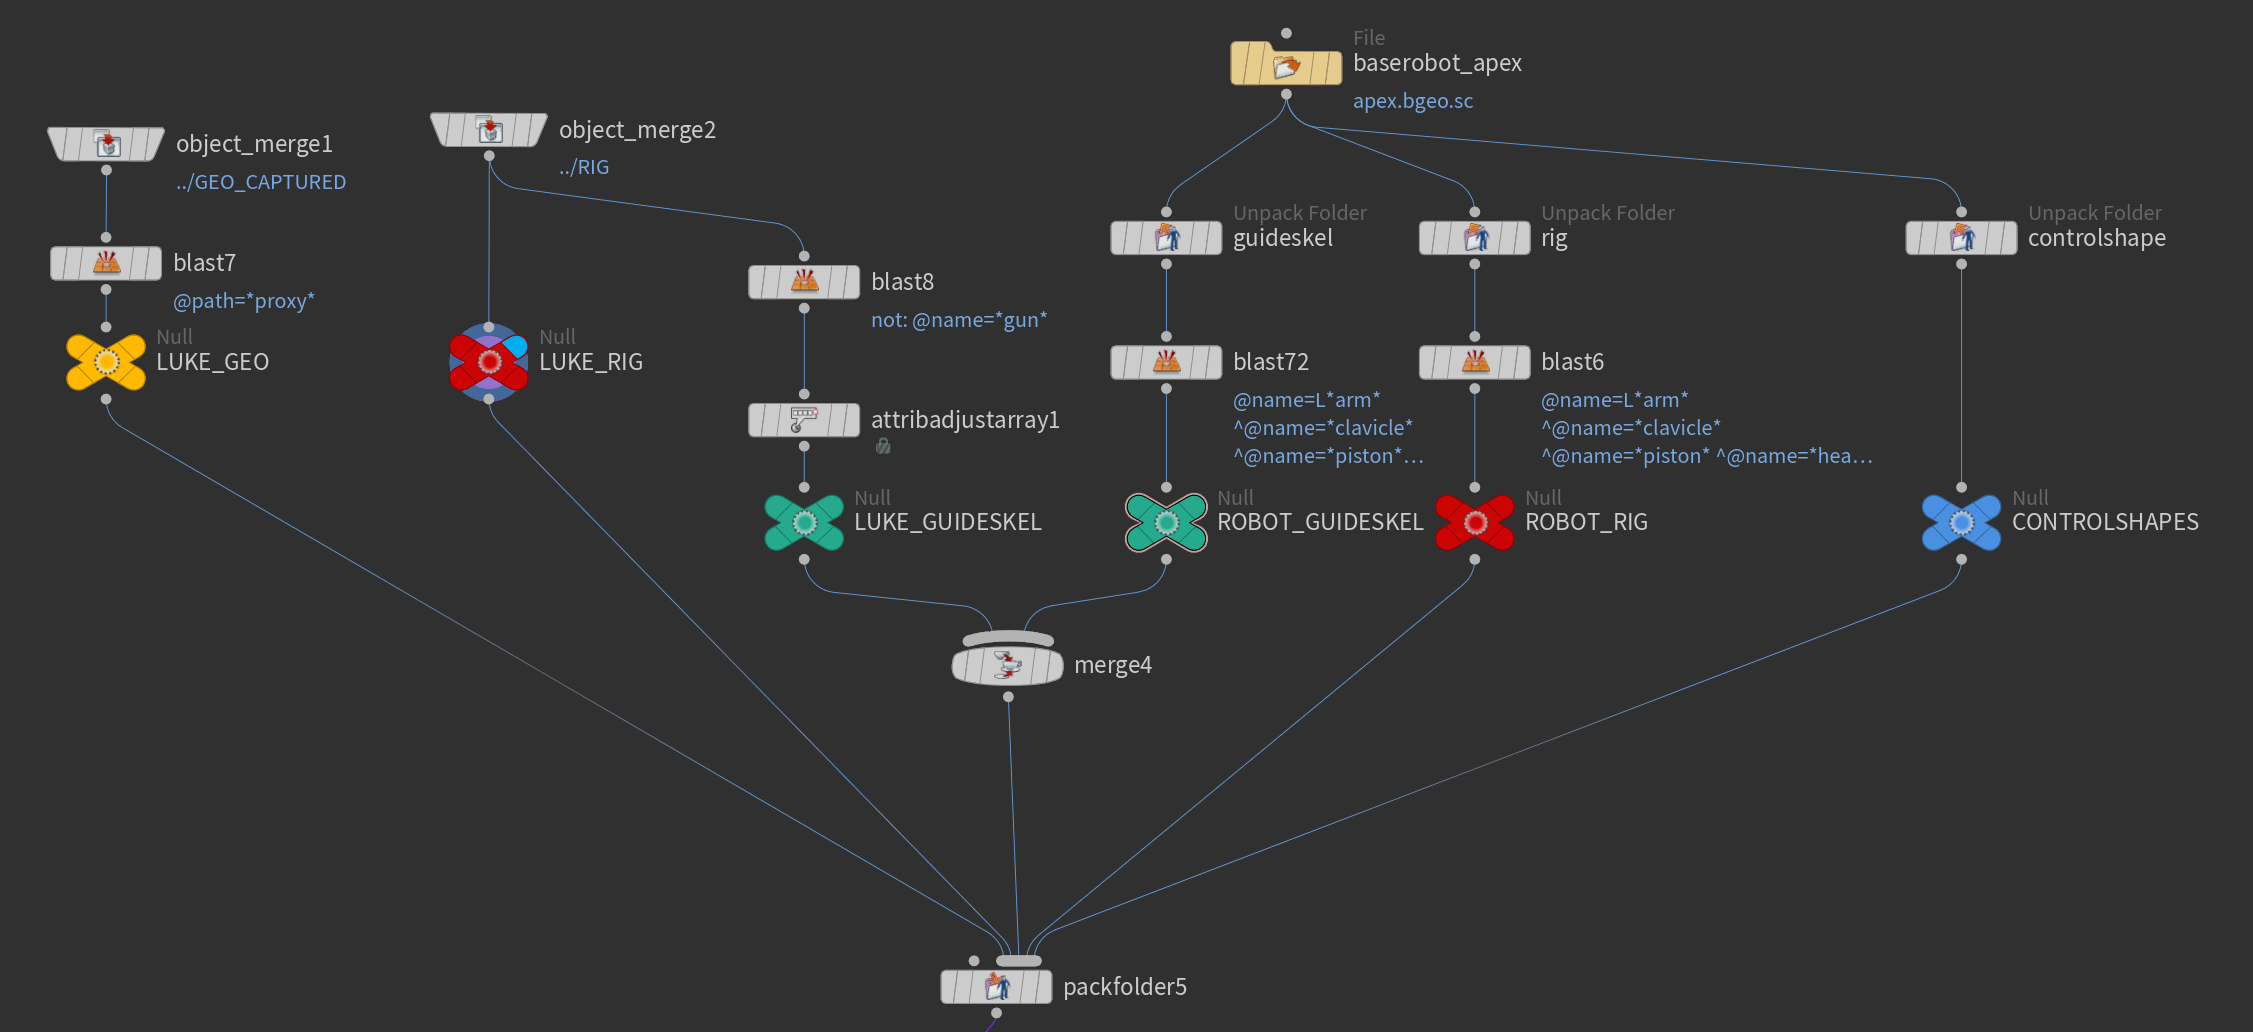
(left) The complete APEX graph for the base robots.
Houdini includes numerous pre-built components for editing the APEX Graph. These are added using an APEX component builder. If you’re stictly using the prebuilt components, then rigging with APEX is extremely simple. The challenge comes with trying to build your own components.
Custom Components
With REBELS, there were some specific controls we needed which involved building custom components for.
One of these components was the “head fin spread” component. I choose to focus on this one for it’s technical simplicity.
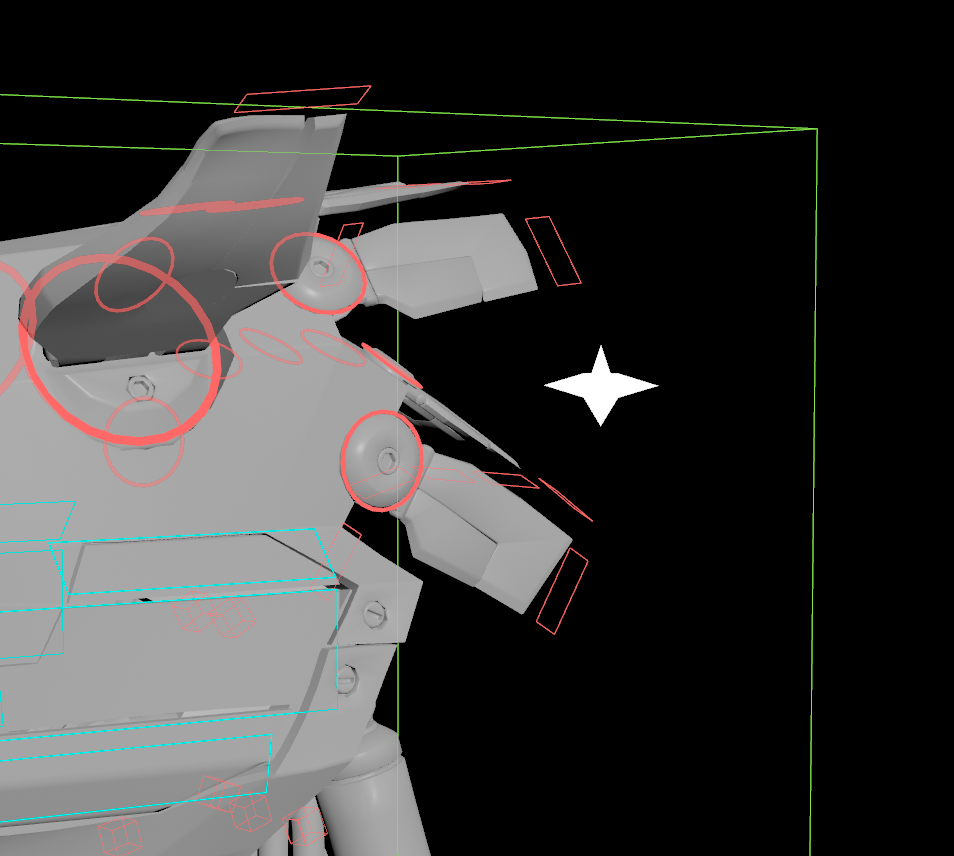
Tim’s model contained a number of fins on the back of the head. We wanted to be able to control the “spread” of these fins instead of having to animate each one individually.
(left) head fins and the start shaped spread controller.
Our custom component created a new control which would add an outwards rotation to each of the fins, so that they could spread in or out. This helped add a bit of more life to the characters and meant we didn’t have to manually animate each fin.
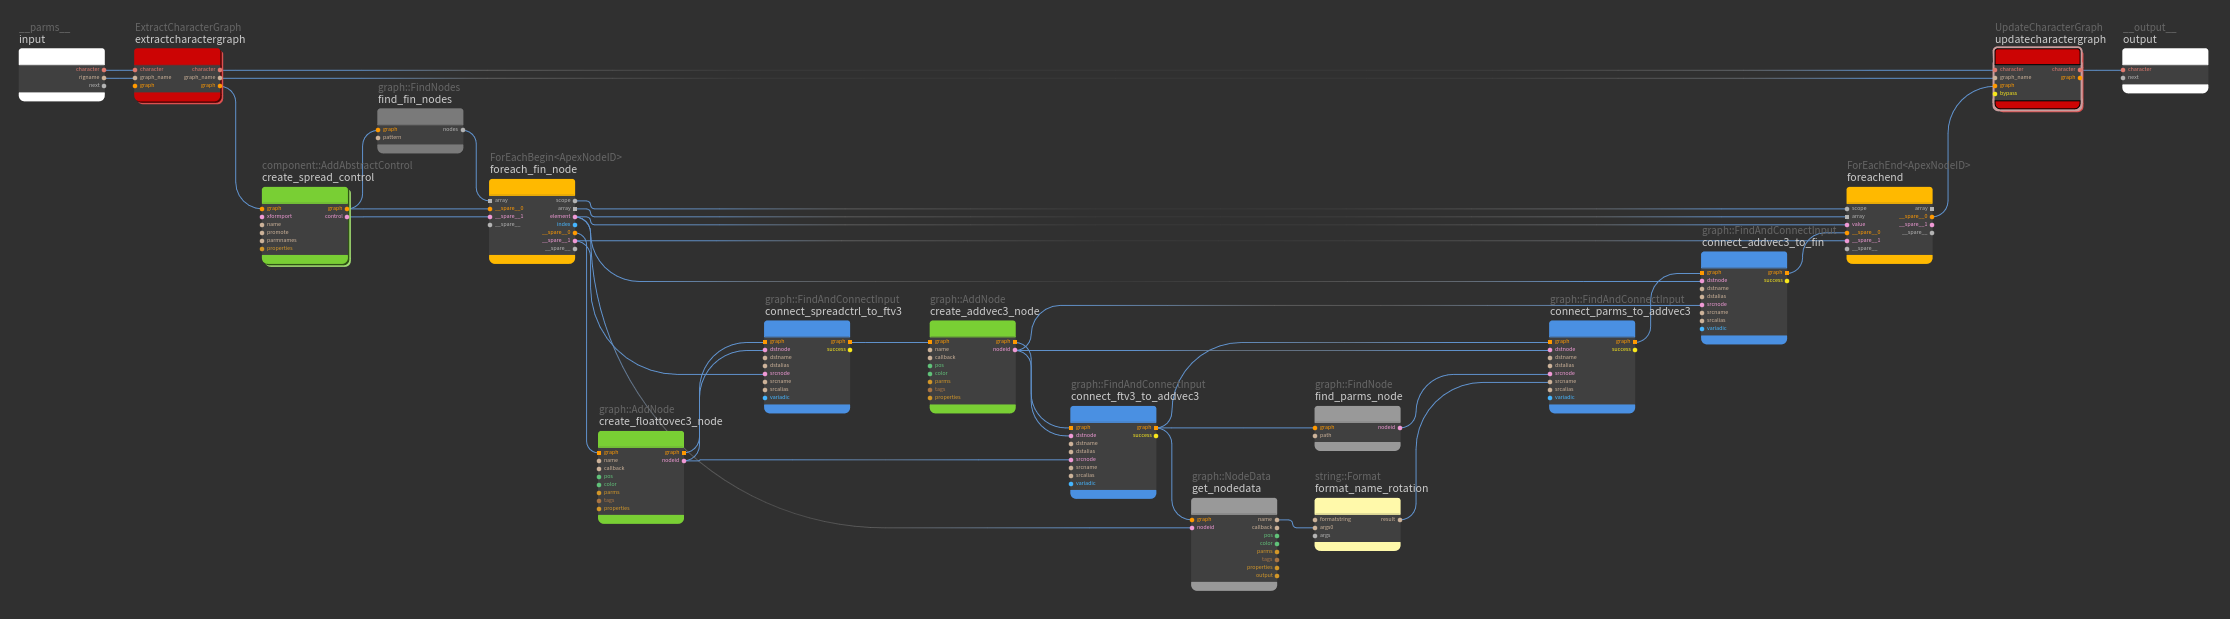
The custom component script I built for the head fin spread.
Modular Workflow
As APEX is non-destructive, it meant we could add and remove components for other characters, without needing to redo the whole system.
The Robot-to-Luke modular workflow. parts of the skeleton and rig would be delete and new parts would be merged in.
This was extremely useful when transferring our rigs from the “standard” robot to Luke, our main character. Luke was exactly the same as the standard robot except for a completely different arm. With APEX, I was able to take the existing rig and delete the graph elements for the old arm and add in the new arm components, without needing to redo the rest of the rig. This saved us a huge amount of time and was extremely satisfying to see, especially when I could make changes to both characters and both would behave accordingly.
APEX and USD
The main reason we wanted to use APEX was so that we didn’t have to worry about converting Maya and Houdini data back and forth. Our film was (almost) entirely USD based and therefore needed a solution that could harness the benefits of both APEX and USD.
Our technique involved creating two files. A rig.usd file which contained the rig and bound geometry, and an apex.bgeo.sc file which contained the APEX Graph.
The rig.usd was built in Solaris using a SOP Import Character. It would use the rig joints from step 1, and the bound geometry from step 2 to create a fully functional USD rigged character.
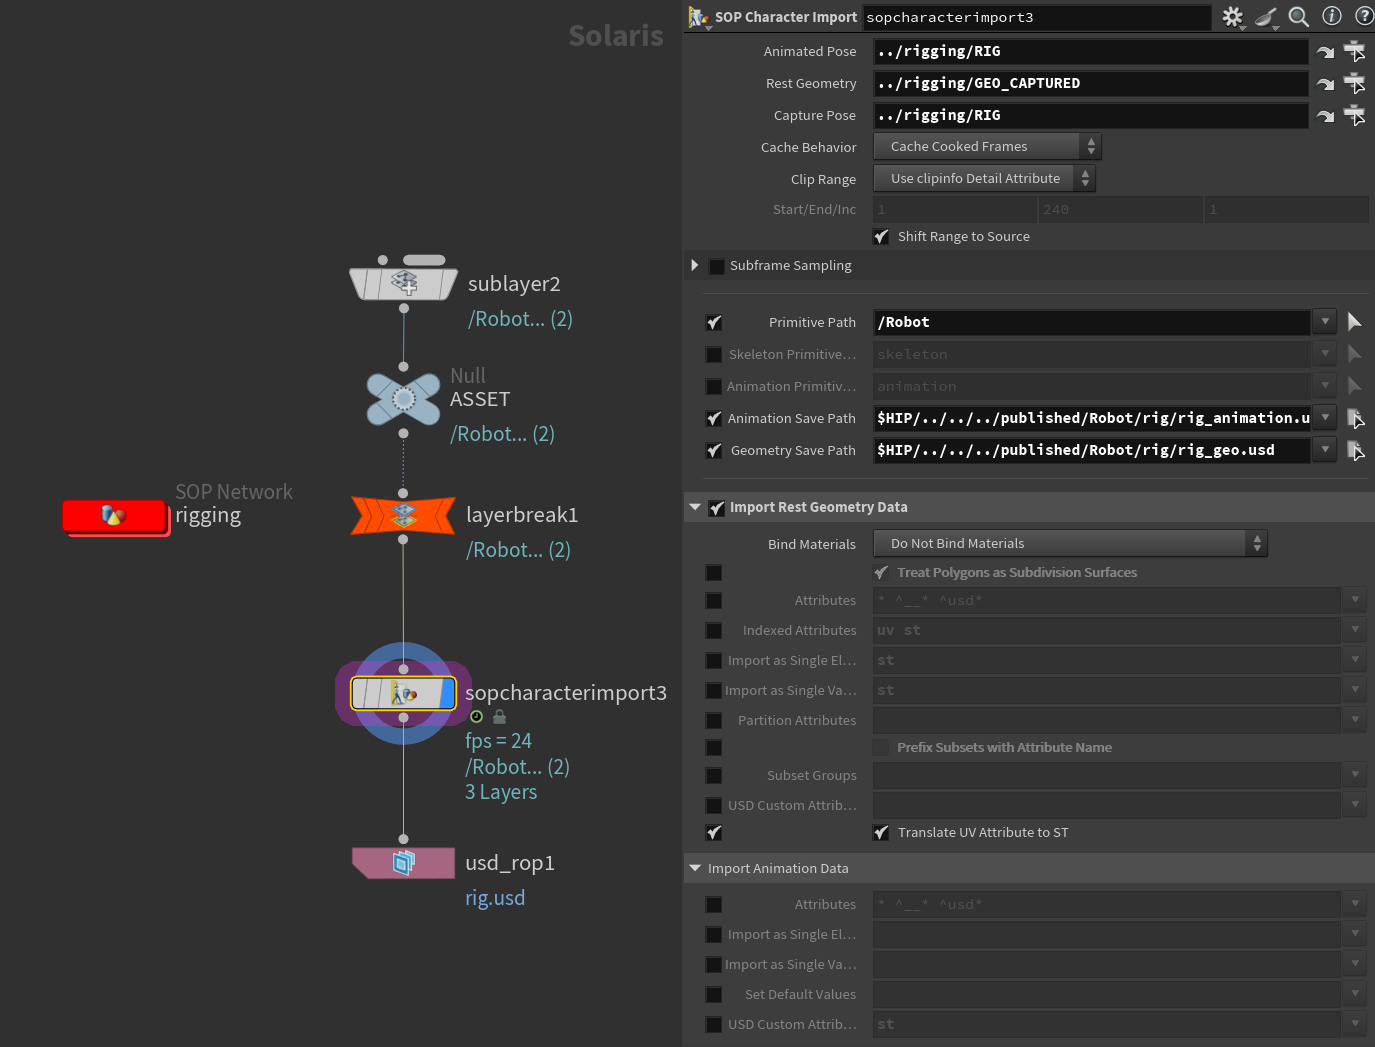
The rig.usd was built in Solaris using a SOP Import Character. It would use the rig joints from step 1, and the bound geometry from step 2 to create a fully functional USD rigged character.
(left) the solaris rig.usd setup
This was then combined with the apex.bgeo.sc file inside our “REBELS Asset” LOP node, which we could use for loading in static or animated characters/assets into our scenes.
Animation would then be done by the animator in the SOP level, and it would directly transfer to the USD level without any manual work.
We could then bake out a lightweight animation layer (lightweight because it’s only the USDSkel that changes) to use for FX and Lighting.
Ideally, it would have been nice for USD to directly edit existing geometry instead of copying it, but overall this workflow worked extremely well, especially when it came to building model and look variants for our robots.
Motion Capture
Although a few of us had prior experience with animating, None of us had a particular interest in the actual animation process. We decided that it would be quicker and easier to use motion capture with a little bit of manual cleanup for the shots (It turned out to be not “a little bit”).
We went through multiple phases of how we wanted to do our motion capture. At first we hoped to use the University’s motion capture system, which we quickly found to be extremely convoluted, poorly setup, and required more work than hand animation. We then looked at AI motion capture systems, in which quite a few proved to be promising. However it struggled for alot of the shots in which our characters would be sitting or moving in complex ways. Luckily, we were able to reach out to a friend who owned an X-Sens suit. We spent an afternoon capturing all the motion clips we needed, and then jumped into retargeting and cleanup.
Re-Targeting
The re-targeting system in Houdini behaved relatively well.
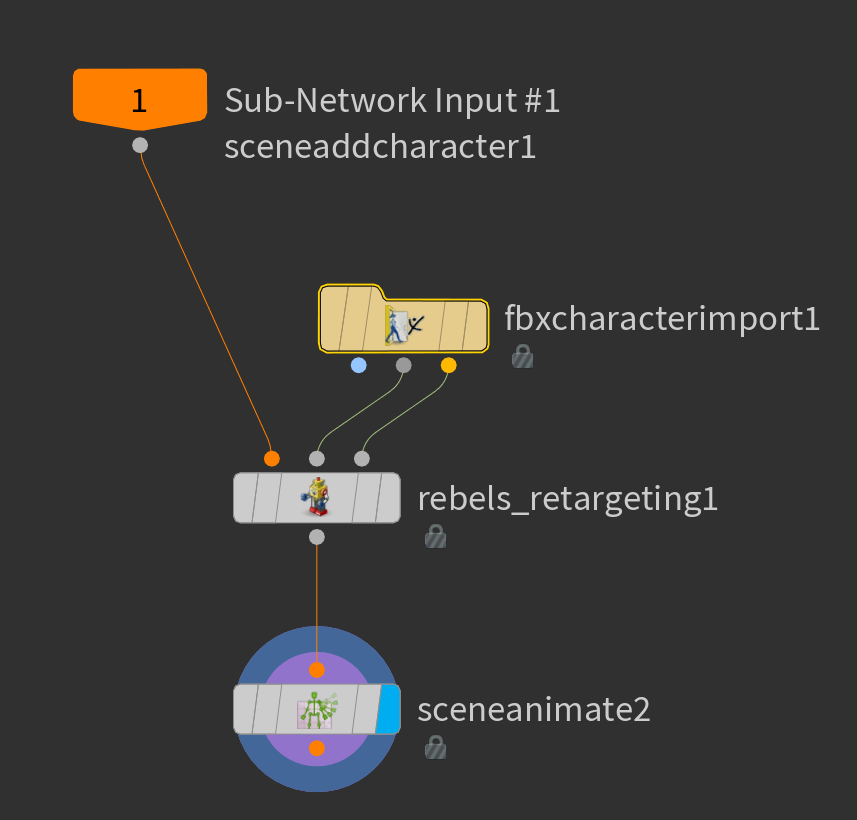
I developed a node that allowed us to feed in our APEX rig, rest t-pose, and animation, and it would spit out a near perfect animated APEX character.
The node would bring controls out of the APEX rig, transform them using Houdini’s built in re-targeting tools, and then feed them back into the APEX rig for animation cleanup.
Animating in APEX
Although the rigging process was quite smooth. We found animating within APEX extremely frustating. Whether it was crashes, the viewport freezing, our dealing with broken parent constraints, alot of our time was spent debugging APEX’s animation tools than actually animating in it.
Halfway through production, we switched from Houdini 20.5 to Houdini 21, which fixed a lot of our issues and made animating in APEX much more enjoyable. However it contained a few bugs which caused our rigs to behave incredibily slow.
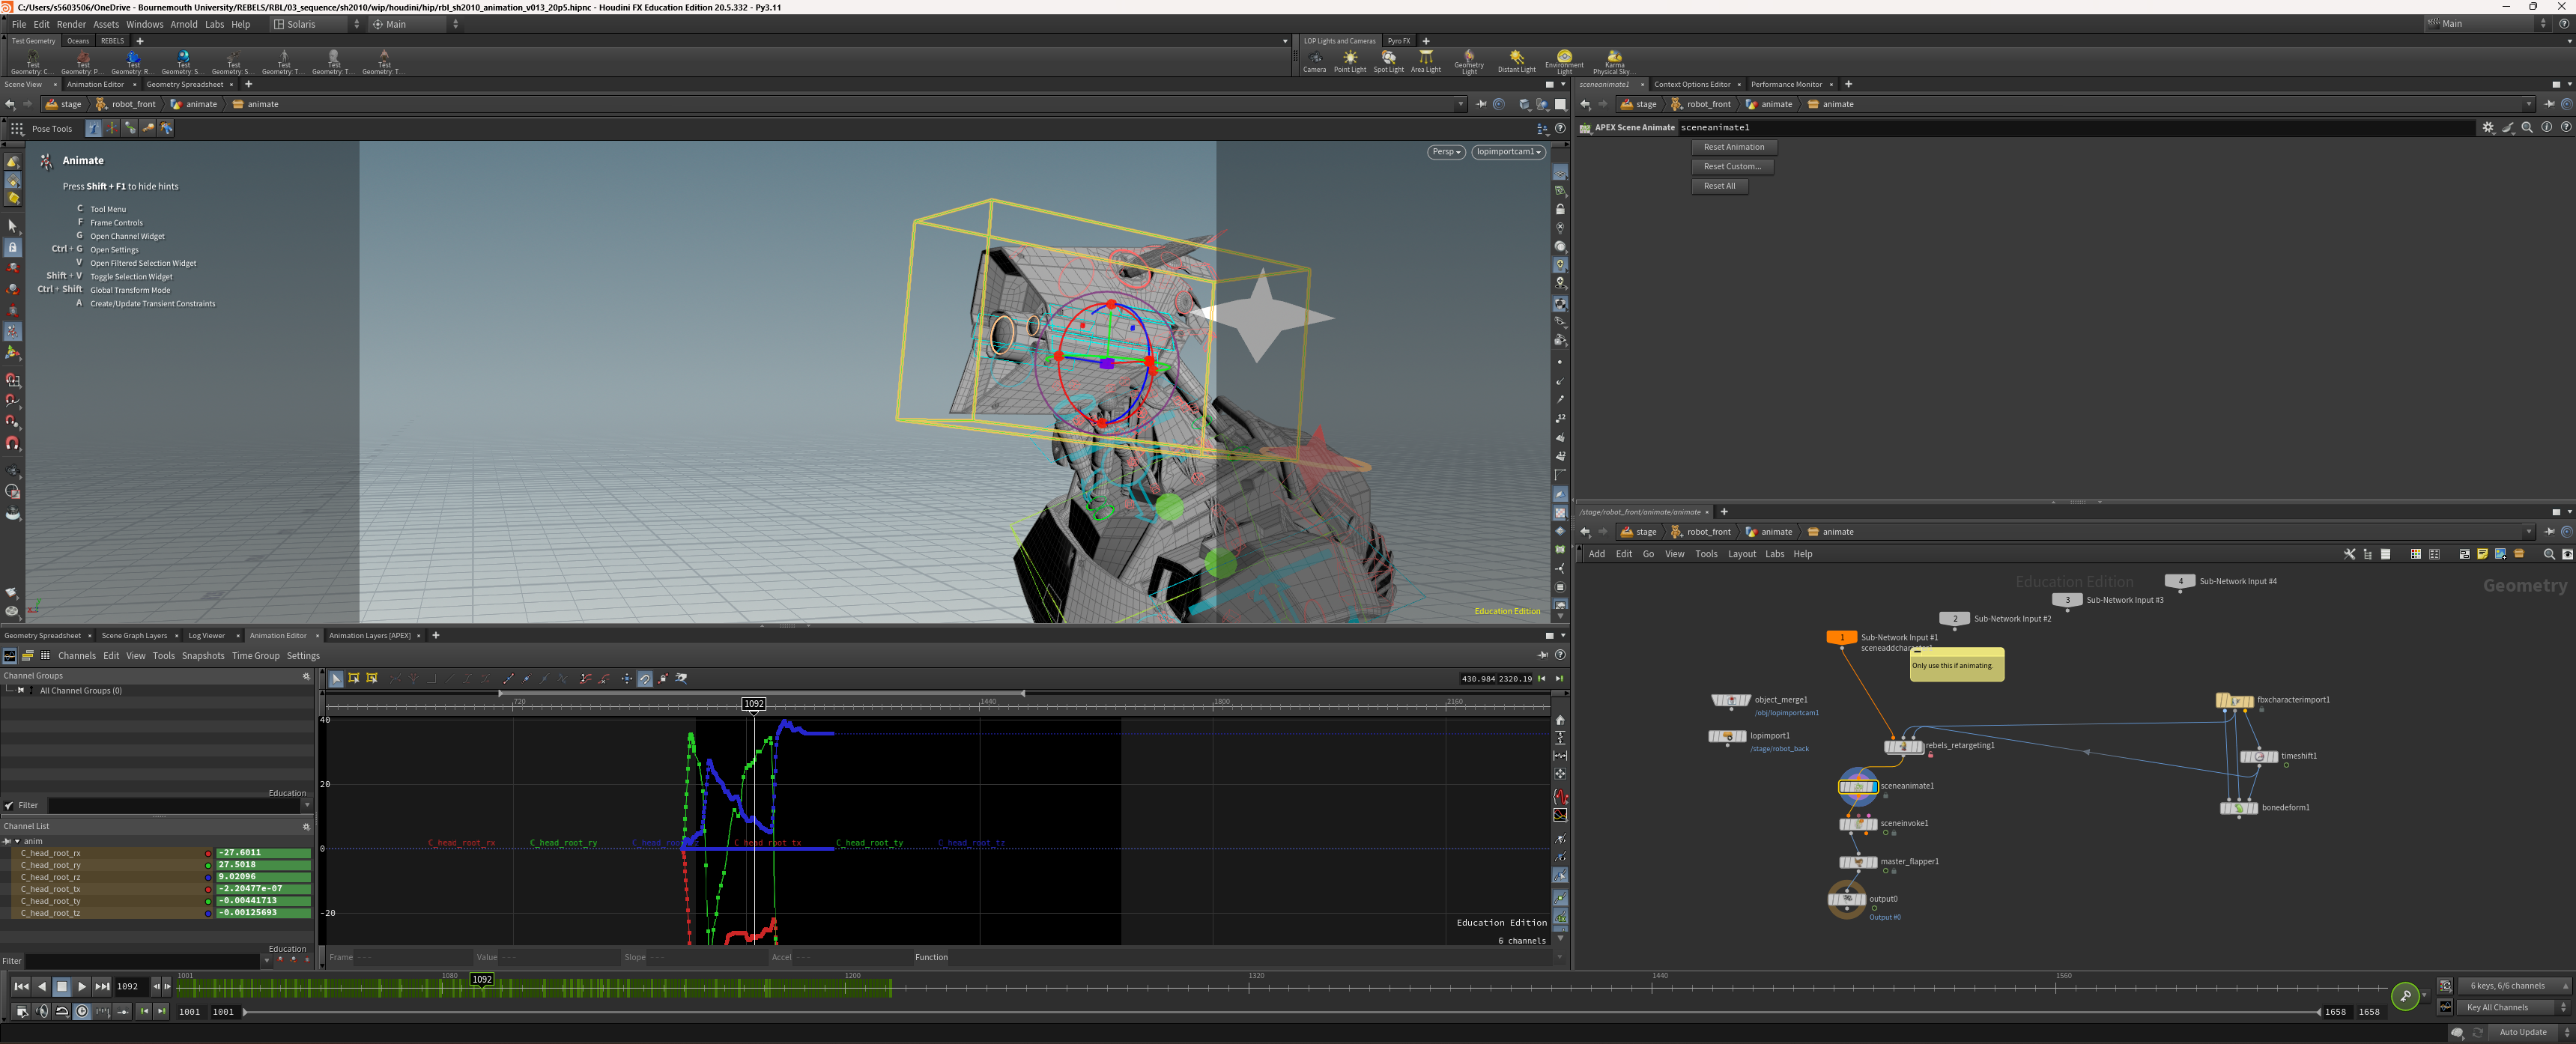
A still frame of our animation viewport.
By the end of the animation stage, we were animating some shots in Houdini 20.5, and some in Houdini 21. Since everything was USD it didn’t matter what version of Houdini we were using since the output USD file was the same.
Understanding APEX took a good amount of time and there are alot of issues that had to be worked around, however once we got the hang of it, it was an incredible tool to use. We were able to animate multiple characters, multiple props, and it wasn’t too intense on our machines. I personally would love to see APEX adopted more by artists and studios.
This article last updated by Christopher Hosken on Febuary 16th, 2026