REBELS Assets
Introduction
Timothy Courtice was the lead asset artist for REBELS. He primarily focused on the hero assets such as the Robots and Blimp, however he also directed us on how to optimise our assets, correctly UV and create realistic textures. This page goes over his process on how assets were created.
Article written by Timothy Courtice.
The Robots
My main task in this project was to create the robots, from the side characters to the main hero (Luke). To start with however, we needed some concepts and we thankfully got help from a concept artist friend of mine, Gabriel Drummond. Gabe helped us massively on this project, allowing us envision our desired aesthetic without the main crew deviating from their main roles.
If you want to look more at the concepts you can check out our Pre-Production page.
Modelling
I did the modelling in Maya and I started by blocking out the general shapes to see how much we could deviate from the concept. Gabe’s concepts were great but some elements were not feasible for the mechanical elements and rig so I had to make some adjustments to the design.
Once I had a blockout which had enough mobility that we were happy with, I proceeded to make the forms more final and aesthetically pleasing. I reworked a few shapes from the concept so they followed a more consistent shape language. In our initial animatic we had closeups of the head and feet so these were the elements I tackled first to ensure we were happy with the design before moving onto details.
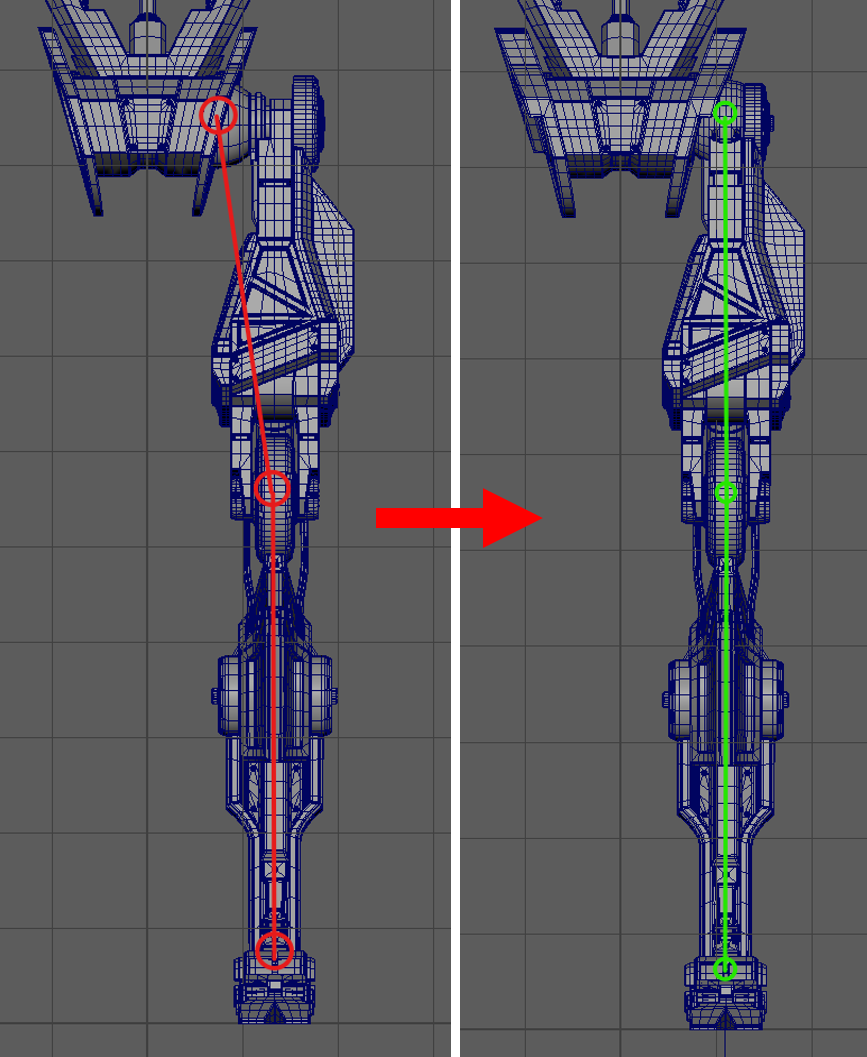
Once I had a model that had all the elements I could hand off a version to Chris for him to start rigging in APEX 20.5. During this stage, Chris and I conversed a lot, making ammendments to the model where necessary to get the rig to work properly. Around half way through this process we found a problem with the model that was very detremental. The hip joint was not aligned in the same plane as the knee and ankle so the IK chain kept on breaking as it could not solve the rest position. Thus I needed to remodel the hips to align the ball joint to the other joints and after that the problem was fixed.
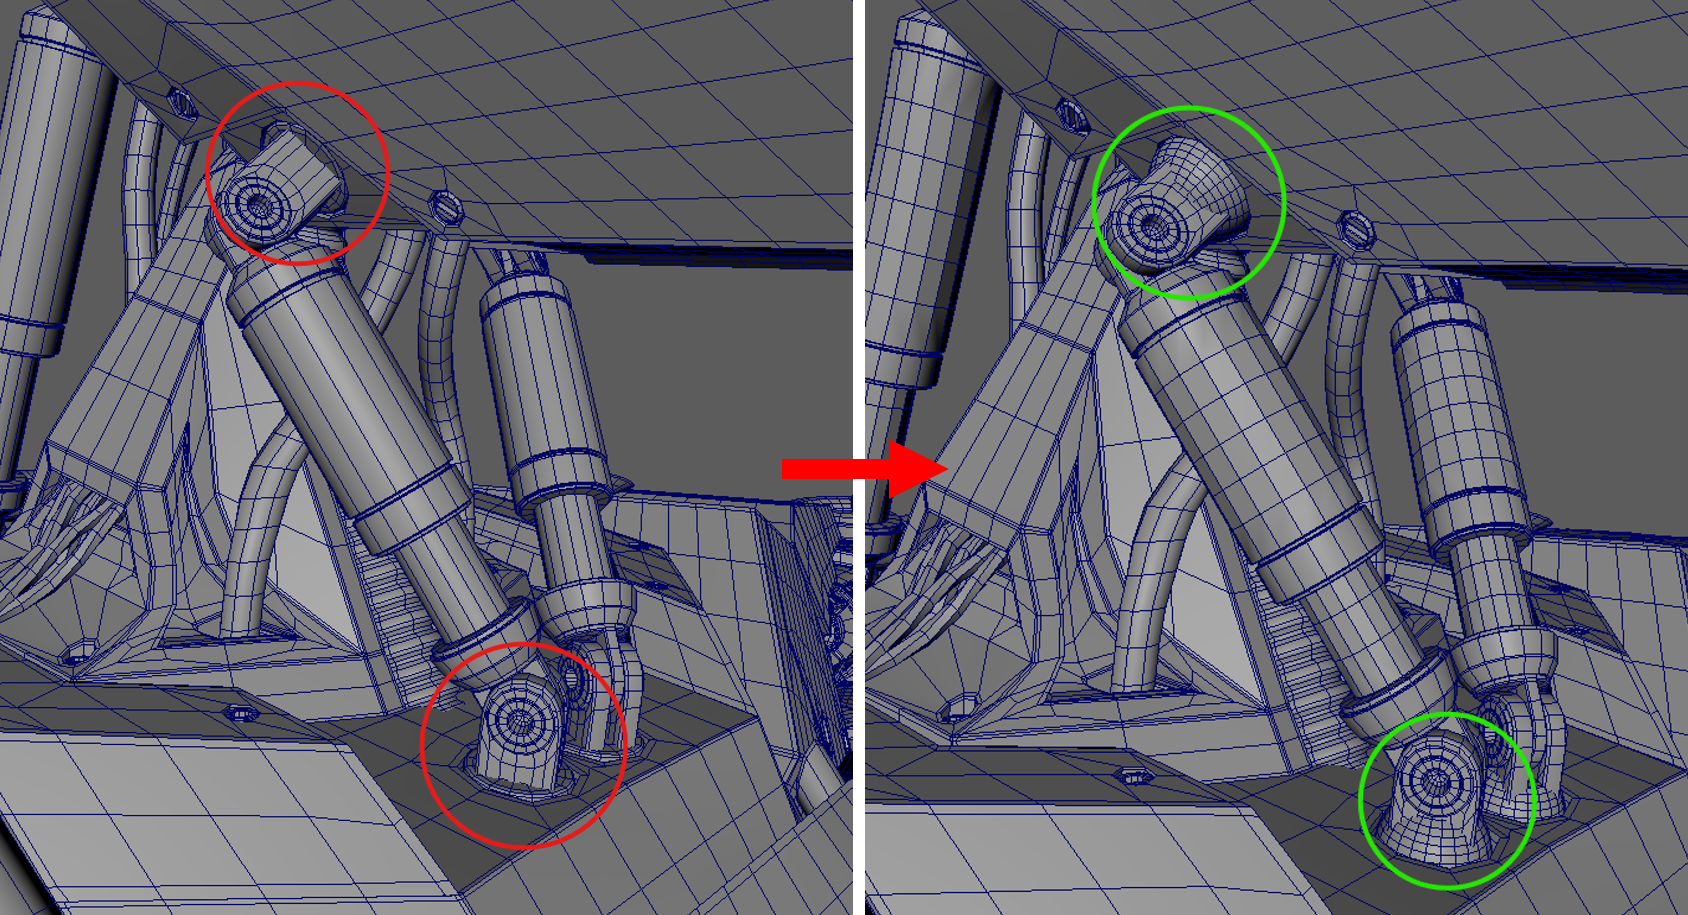
Another problem we faced was with the pistons around the neck. Unfortunately in APEX currently, it is not possible to lock axis for IK chains so the connection points of the pistons kept on rotating around with the initial design. Thus we had to change the joints to ball joints and this fixed that problem, however the pistons could still not retract so the intended motion of the pistons was lost.
After the model was finalised I could UV unwrap it and then move onto creating the model for Luke. This process involved adding damage and variation to the existing robot model, giving it character as well as making the transforming arm. The arm took some time to get down as I had to consider a feesible way for it to transform between the 2 states designed.
Texturing
UVs were completed in Maya, a process I find quite enjoyable. However for many repeating objects I had UVs already completed to make this stage easier. All UVs were laid out appropriately in a C/L/R format.
I started with the side robots in Substance Painter so I could make a base setup that I could use for Luke and so Felix could create consistent texture variations for the side robots. The actual material and colours of the robots went through a lot of iterations, initially we went for an IG-11 (star wars) aesthetic with worn copper but this conflicted with rust which we also wanted.
We settled for blackened steel for the internals and painted steel for the panels. I wanted to keep some of the copper aesthetic from the design so there are highlights of brass elements scattered throughout the design. As well as this, to add character and world building to Luke I added some details such as scratched up logos and text, as though he made to detatch himself from the creators.
The materials were created in materialX in houdini as we worked on a USD pipeline throughout the project. One aspect I wanted to make sure looked real were the lenses as we have a close up that focuses on this part of the face. Camera lenses are often polarised and this was an aesthetic created with thin film in the material properites.